Having no sound from your laptop or computer is a very common issue that may either be related to the computer’s settings, a window’s driver, or a minor hardware problem. Fixing a laptop or computer that emits no sound is not rocket science; anyone can do it by following any of the following procedures.
Check Your Computer’s Settings
Make sure your laptop is not muted
You can easily forget that you turned off your computer’s volume. Before you try anything else, begin by pressing the “Volume Up” button on the computer’s task bar. If it indicates that the computer is at 100 percent but you are still not getting any sound, check the connections of your audio devices
Audio Device Connections
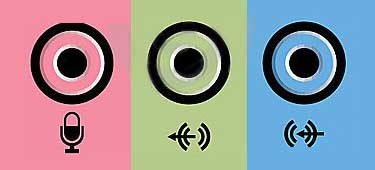
If you partially plug in headphones or a speaker into your computer, you are likely to get no audio output. The other problem with audio devices is not plugging them in the correct ports. Through trial and error, plug in your headphones or speaker into the different audio ports of your laptop to see whether that is the issue. If that does not fix the sound issue, proceed to the audio mixer.

Windows Audio Device Connections
Audio Mixer Settings

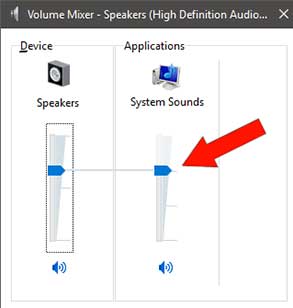
Volume Mixer Settings
To get to the audio mixer, right click on the volume icon on the task bar of your computer or laptop. This action will trigger a drop down menu. Move to the first option-“open volume mixer“. Review the volume levels for the open applications. Each open application has a slider below its icon. If this slider is at the bottom of the window, this means the volume has been muted. Drag the volume slider up for these applications.
Change the Speaker Format
Unplug the devices connected to your computer. This includes speakers, headphones, and anything plugged into the headphone jack of your computer. If you are using a computer, reconnect the speakers.
Right click on the volume icon and select the “play back devices” option. Double click on speakers to open the computer’s internal speakers. Click on the advanced tab at the top of the window and click the drop down menu under the default format.
This box will say something like “16-bit, 48000 Hz (DVD Quality) or “24-bit, 44100 Hz (Studio Quality). Next, change the default setting and click on test. This is an option that prompts your speakers to play a tune if they are working.
Repeat the test with every frequency until you find a frequency that produces audio. If you are not able to resolve the audio issue with this approach you have problem with your audio drivers.
Check Your Windows Sound Drivers
Corrupt Audio / Sound Drivers
It is also possible that your windows sound drivers are corrupted. Go to “device manager” on your laptop, right click on the sound device, and choose uninstall. Restart your computer and windows will reinstall the drivers. If this fails to fix the audio problem, you may need to update the driver.
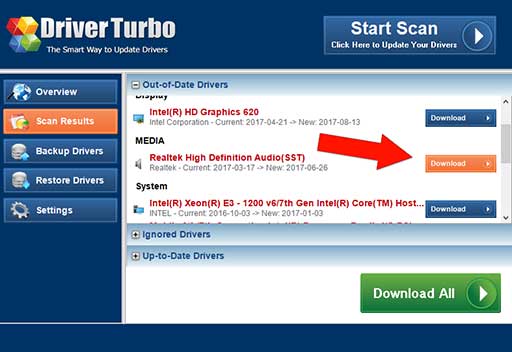
You may update your drivers through a windows update or by using Driver Turbo. In most cases, using windows automatic drivers update may fail to locate the appropriate sound drivers for your computer. To help you with updating your sound driver, download and install Driver Turbo. The award winning software detects any outdated audio drivers and downloads and updates all the drivers with one click. If this fails to fix your audio problem, then you probably have a hardware issue.

Detects Outdated Audio Drivers with Driver Turbo
Update Your Bios – Enable Audio Sound
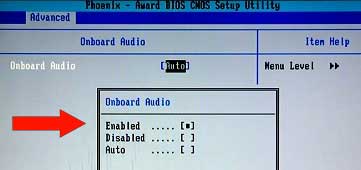
If all these steps fail to work, your “BIOS” may need to be updated. Go to the laptop manufacturer’s site and download the latest “BIOS”. You should also go to the “BIOS” settings and check whether the sound card icon has been enabled.

BIOS Audio Settings
Sound issues are one of the common problems you are likely to encounter with your laptop or computer. Troubleshooting the source of the issue is something you can do on your own. However, if the problem persists after trying each of the above methods, you may contact our certified PC technicians buy using the following link – Contact us.


